





Exporting OBJ and FBX Files: How to Export 3D Models Between Rendering and CAD Software

This comprehensive guide to the 3D rendering software workflow answers the following questions about how to export 3D models seamlessly:
- How can I import and export 3D models between different 3D modeling software applications, and what are the ideal file formats for this process?
- What should I do if my current 3D software isn’t suitable for creating custom models, and what alternative programs or software types should I use instead to export 3D models?
- What key principles should I follow when designing a new model to ensure its parts can be easily textured and animated when I export 3D models to another program later?
- How do I apply textures to a model in Poser Pro?
- What are the recommended material settings for optimal results in Poser Pro?
- How can I separate a complete 3D model into individual, movable parts within Poser Pro?
- How do I quickly break apart (“explode”) a unified model into separate objects using Blender?
- How can I duplicate parts and save them with unique index names in Solid Edge?
- How do I assign different surface styles to parts in Solid Edge?
- What is the workflow for exporting an *.ASM assembly into an *.OBJ file format from Solid Edge when you need to export 3D models?
- What quality standards and file preparations are required to sell and export 3D models in an online store?
- Why is it recommended to export OBJ and FBX formats for transferring models between 3D software?
- Which popular 3D rendering and game engine software (e.g., Maya, Unity, Unreal) support *.OBJ and *.FBX formats when you export 3D models?
- What should I do if the imported model is too small or too large compared to the grid in Poser Pro?
- How can I copy the complete material and texture settings of one part (e.g., a wheel) to another with just a few clicks in Poser Pro?
- Why is it recommended to leave the Diffuse and Specular color settings on white when using image textures?
- Why is it essential to save duplicated parts with index numbers (e.g., Wheel 1, Wheel 2) during the initial design phase in CAD software?
- What role does the KeyShot add-in play when exporting an *.OBJ file from Solid Edge?
- How do I set up a parent-child relationship in Poser Pro so that two parts—like the wheel and the rim—move together during animation?
- How can we prevent textures from getting lost or folders becoming unorganized when sharing or distributing the model?
- What are the most important settings (checkboxes) to select in the Poser Pro export window when preparing to export 3D models for an online store?
- Why is it a good practice to load the exported model into a completely new, empty project before finalizing and selling it?
- Exactly which file extensions (*.OBJ, *.mtl, image files) must be included in the ZIP package offered for download when you export 3D models?
- Why might the *.FBX format be more advantageous than *.OBJ in certain cases when the model consists of numerous separate parts?
- Which keyboard shortcuts (e.g., Tab, P) and menu options like Blender separate loose parts can be used to quickly separate models?
- Which workflow (steps 1-14 vs. steps 1-35) is recommended for someone who only wants to render, and which one for someone preparing an animatable model for sale?
Introduction to the Workflow: How to Export 3D Models
Hello fellow 3D artists!
I’m sure many of you have experimented with various 3D rendering software. Every program has its own unique advantages and specific areas where it truly shines. In this article, I will show you how to efficiently export 3D models created in CAD software into 3D animation and rendering programs.
While my primary focus will be on transitioning CAD to Poser Pro and Solid Edge, these techniques and core principles are universal and can be easily adapted to other software like Blender.
By the end of this guide, you will know exactly how to prepare a project in Poser Pro for final export. Ensuring it can be imported into any software that supports OBJ or FBX formats without losing any material settings is crucial when you export 3D models to sell in online stores or share them on community platforms.

The Importance of Format Compatibility: Why Export OBJ and FBX?
The ultimate goal when you export 3D models is for your creation to open in any program looking exactly as you designed it. While cross-software perfection isn’t always guaranteed, ensuring that Diffuse, Specular, and Bump maps load correctly saves the end-user a massive amount of time.
Poorly exported models often result in missing textures, renamed files, and chaotic folder structures, leaving the user guessing which map goes where. To avoid this, when you export 3D models, I highly recommend using the most universally compatible formats. You should always choose to export OBJ and FBX files. These are supported by major software (Blender, Autodesk Maya, 3ds Max, Cinema 4D, Poser Pro, DAZ) and game engines (Unity, Unreal Engine).
My 3D Journey: From Poser to CAD
As we grow as modelers, we often discover new software that offers superior rendering capabilities. However, transitioning means risking the loss of countless models built in our old software.
Personally, I have built countless scenes and characters in Poser Pro 13. Even if it’s considered a bit older, its simplicity and ease of use have always appealed to me. While DAZ Studio might offer higher-end graphics, I never quite made the jump.
However, I quickly realized that Poser Pro isn’t built for creating complex, custom 3D objects from scratch. This led me to CAD software. Drawing on my past studies, I learned to design in Solid Edge and bring those models into Poser Pro. The trick. You must design the CAD model as separate components (an assembly), not a single solid body, if you want to texture, rig, and export 3D models properly to animate the parts later.

The Ultimate Workflow Guide: Export 3D Models from CAD to Poser Pro (and Beyond)
Depending on your end goal, I have broken this process down into three distinct paths to successfully export 3D models:
- Path A (Steps 1-14): For Rendering Only. If you just want to texture and render your CAD model in Poser Pro without moving or animating any parts.
- Path B (Steps 1-18): For Animation. If you want to break apart specific components in Poser Pro for animation (e.g., spinning wheels).
- Path C (Steps 1-35): For Selling & Sharing. If you want to export an airtight, universally compatible OBJ or FBX file with zero texture loss.
Phase 1: Preparation in Solid Edge (CAD)
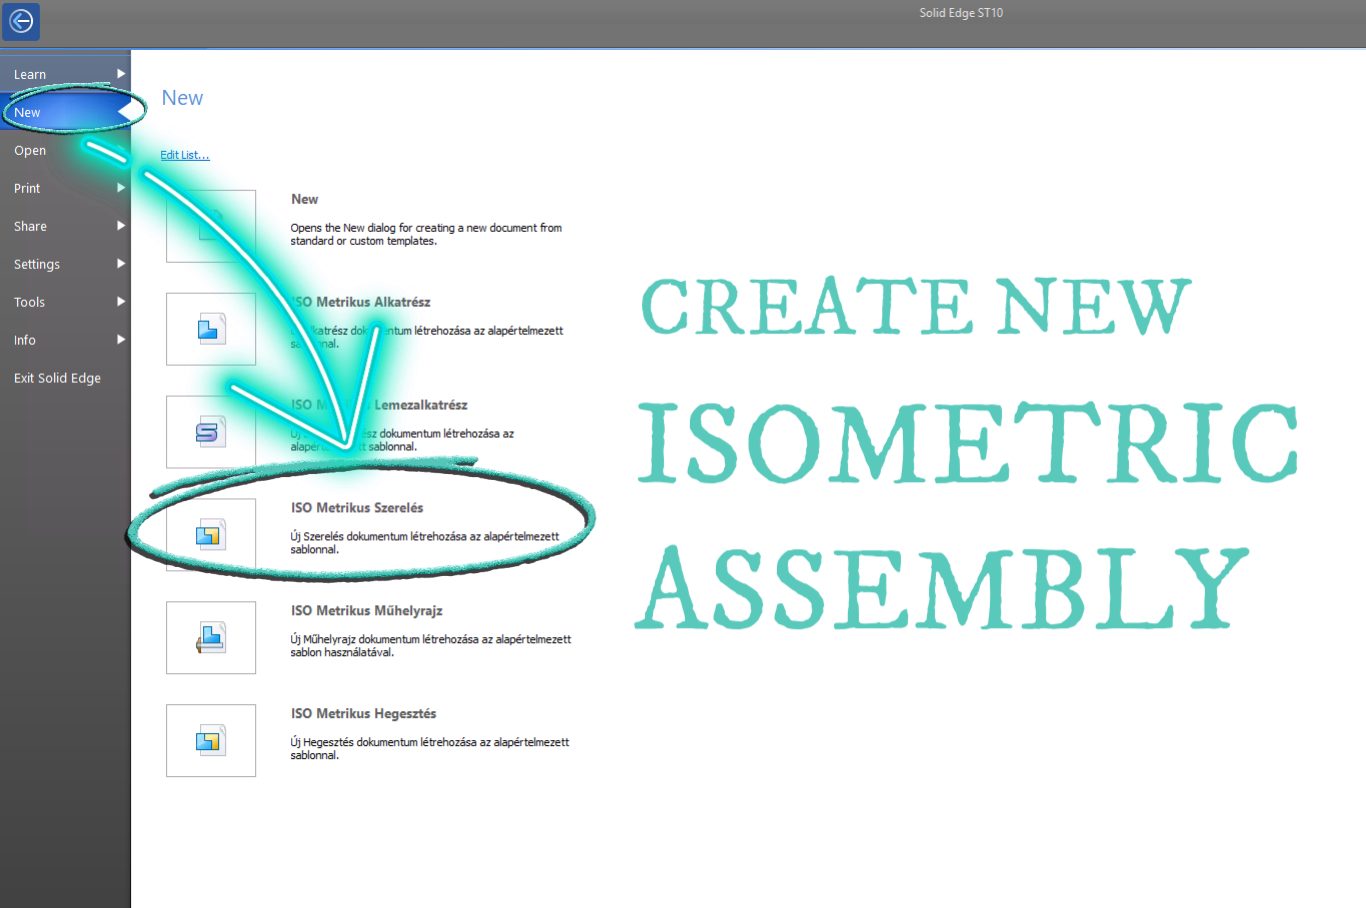
- Start a new Assembly (*.asm) project in Solid Edge. Build your model logically. If you want to animate a car’s wheels, design one wheel, open it separately, and use “Save As” to create indexed copies (e.g., Wheel 1, Wheel 2, Wheel 3, Wheel 4). Do the same for the rims if they need a different texture.
- Assign random, distinct surface styles (e.g., Steel, Gold, Silver) to different parts. The actual color doesn’t matter; this just ensures that the parts are visually separated and their materials are distinctly recognized later. Grouping by material is much harder once the model is in Poser Pro.
- Once separated, open the KeyShot rendering add-in within Solid Edge (install it or enable it on the ribbon if you don’t see it). Pause the render immediately—you don’t need a finished image. Go to the File menu -> Export to OBJ.
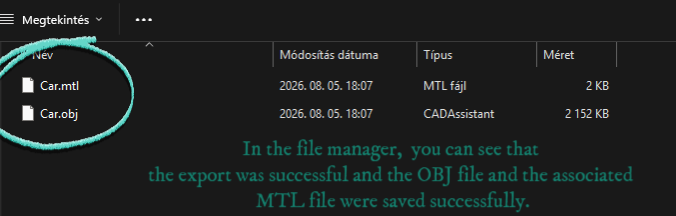
- Save the file with a clear name (e.g., “Car”) into a dedicated “Export OBJ” folder.
- You will now have an *.OBJ file and an *.mtl (material library) file in your folder.


Phase 2: Importing and Texturing in Poser Pro
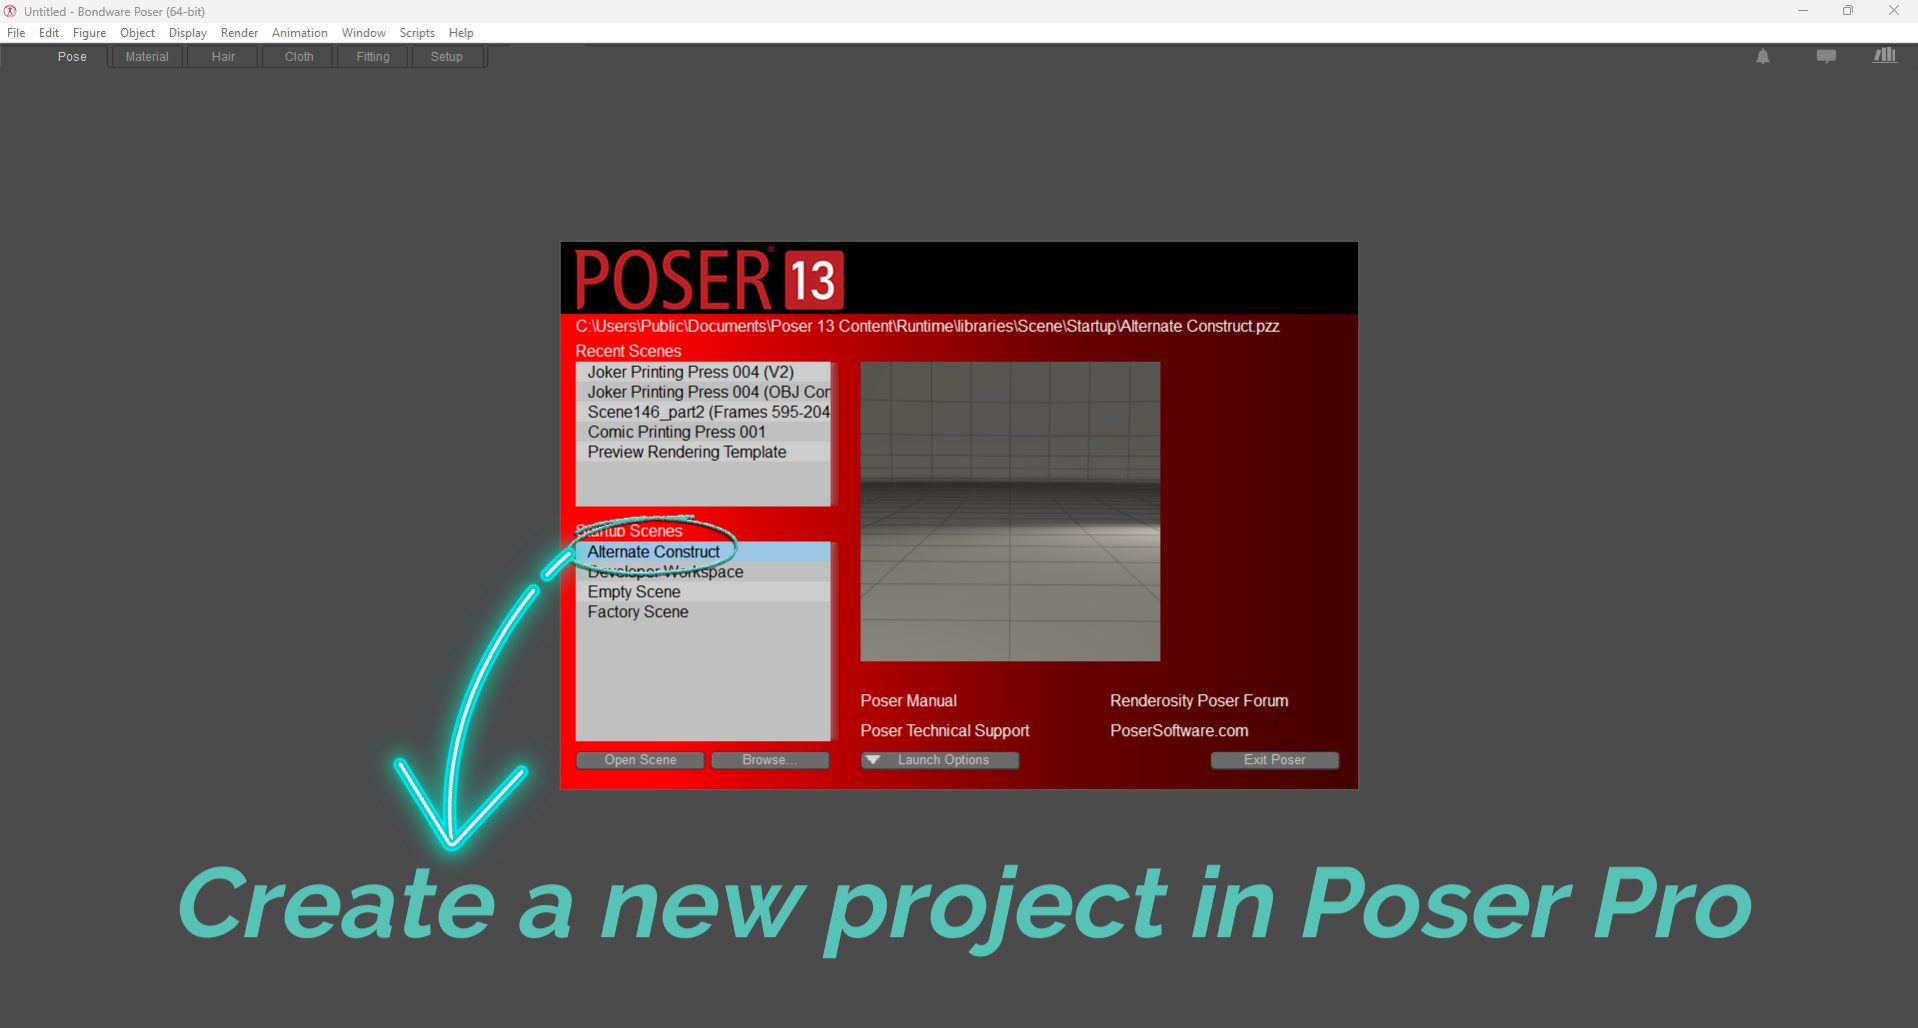
- Open Poser Pro and save a new project (e.g., “Car Poser Project”).
- Go to File -> Import -> Wavefront OBJ and select your file.
- In the Import Options, ensure “Centered” is checked. Note: Solid Edge and Poser use different scale units. If you don’t see your model, it might be microscopic or massive. Try importing at 1% or 500% until it appears. Once visible, select it (e.g., “Car” will appear in the Props tab) and use the Scale dial in the Parameters tab to fit it to the grid.
- Your model currently acts as a single solid object, which makes scaling and moving the whole car easy. Thanks to your CAD prep, the materials are still separated.
- Open the Material Room. Click on a specific part (e.g., “Wheel 1”). You’ll see its name appear. Click through the model to ensure every part you separated in CAD has its own material zone.
- Apply your image textures to the Diffuse, Specular, and Bump nodes. Pro Tip: Always leave the base Diffuse and Specular color blocks set to White when using image textures. This prevents colors from multiplying incorrectly when you export 3D models to other software.
- How to quickly copy materials: Once “Wheel 1” is textured, click the top of the PoserSurface node to make it active. Right-click it -> Select All. Right-click again -> Copy. Now click on “Wheel 2”, right-click its PoserSurface node, and select Replace. The entire material setup instantly copies over!
- Repeat this until the whole model is textured.
- (End of Path A) If you only want to render a static image, you are done!


Phase 3: Breaking Parts Apart for Animation
- To separate parts in Poser Pro (e.g., to spin a wheel), open the Grouping Tool in Editing Tools.
- Click New Group and name it (e.g., “Group 1”).
- Click Add, select “Material”, and choose your wheel’s material from the list. It will highlight in red.
- Click Create Prop and give it the same name you used in Solid Edge. It will appear in your Props list.
- Crucial Step: You must now delete this geometry from the original car body. Select the main car object, open the Group Editor, and ensure the wheel is still highlighted red. Click Modify -> Invert (this selects everything except the wheel). Click Create Prop, name it “Car 2”, and delete the original “Car” prop.
- Repeat this (admittedly tedious) process for every moving part.
- Setting Constraints: To make parts move together (like a wheel and its rim), click the Wheel, go to the Object menu -> Change Parent, and select the Rim from the list. Now, when the wheel spins, the rim spins with it.
- (End of Path B) Your model is now fully textured and rigged for animation in Poser Pro!


Phase 4: Exporting for Store Sales and Sharing
- To prepare the model for distribution and to successfully export 3D models, click Export -> Wavefront OBJ. Create a final folder (e.g., “Car Model Download”). Ensure these checkboxes are ticked:
- Weld body part seams
- Include body part names in polygon groups
- Preserve existing material names
- Copy textures to destination folder
- Save your current Poser Project.
- Create a completely New Poser project (e.g., “Car Final Test”).
- The Clean Room Test: Import the OBJ you just exported. If Poser asks to locate a texture, it means a file path is broken. Fix it now.
- Check all materials, groups, and parts. If everything works perfectly, render your promotional images from various camera angles (wide shots and close-ups).
- Packaging the ZIP: To sell or share the model, pack only the *.OBJ, *.mtl, and the image texture files (PNG/JPG) into a ZIP file. Do not include the Poser project files. If you found errors, fix them in your master file, re-export to a “V2” folder, test again, and delete the old folder.


Phase 5: The Ultimate Standard – Creating an FBX via Blender
- While an OBJ is often enough, providing an FBX file is a massive bonus for buyers because FBX files inherently keep all separated parts as distinct objects within a single file. The easiest way to create this is in Blender.
- Open Blender and go to File -> Import -> Wavefront OBJ.
- Right-click to select the entire model (an orange outline will appear).
- Press Tab to enter Edit Mode.
- Press P on your keyboard.
- Use the Blender separate materials feature: Select By materials from the Separate menu. (Wait a moment while it calculates).
- Press Tab again to return to Object Mode.
- Click on an empty space to deselect. Your model is now perfectly “exploded” into separate objects!
- Go to File -> Export -> FBX.
- Save it into a new folder (e.g., “Car Model Download FBX”).
- (End of Path C) Finally, do one last “Clean Room” test by importing the FBX into a fresh Poser (or other software) project to ensure the textures, materials, and separated parts survived the journey. Pack this into a ZIP for your store!


Conclusion: Mastering How to Export 3D Models
As you can see, when you export 3D models, the workflow varies wildly depending on your goals. If you only need a static render, the process to export 3D models is incredibly fast, thanks to smart material grouping in CAD. If you need animation, Poser requires a bit more elbow grease to separate parts.
Finally, preparing a pristine model for the marketplace requires a multi-step quality assurance process to ensure end-users can load your model effortlessly.
If your final ZIP allows a stranger to import your model into their software with zero missing textures, you’ve done an excellent job mastering how to export 3D models.
I hope you found this guide helpful and picked up a few new tricks for your workflow to export 3D models. Thanks for reading, and happy modeling!
Check out the 3D object modeled in the article that I uploaded to the store, and find out what you should aim for when uploading a model.
OBJ és FBX fájlok exportálása: Hogyan történik a 3D modellek exportálása renderelő és CAD szoftverek között
Ez az átfogó útmutató a 3D renderelő szoftver munkafolyamatról a következő kérdéseket válaszolja meg azzal kapcsolatban, hogyan történjen a 3D modellek exportálása zökkenőmentesen:
- Hogyan tudok importálni és hogyan történik a 3D modellek exportálása különböző 3D modellező szoftverek között, és melyek az ideális fájlformátumok ehhez a folyamathoz?
- Mit tegyek, ha a jelenlegi 3D szoftverem nem alkalmas egyedi modellek létrehozására, és milyen alternatív programokat vagy szoftvertípusokat érdemes használnom, ha a cél a 3D modellek exportálása?
- Milyen alapelveket kell követnem egy új modell tervezésekor, hogy a részeit később könnyen lehessen textúrázni, amikor megtörténik a 3D modellek exportálása egy másik programba?
- Hogyan alkalmazzak textúrákat egy modellre Poser Pro-ban?
- Melyek az ajánlott anyagbeállítások az optimális eredmény eléréséhez Poser Pro-ban?
- Hogyan tudok egy teljes 3D modellt különálló, mozgatható részekre bontani a Poser Pro-n belül?
- Hogyan tudok gyorsan darabokra szedni (“felrobbantani”) egy egyesített modellt különálló objektumokra a Blender segítségével?
- Hogyan tudom lemásolni az alkatrészeket és egyedi indexnevekkel elmenteni őket Solid Edge-ben?
- Hogyan rendelhetek hozzá különböző felületi stílusokat az alkatrészekhez Solid Edge-ben?
- Mi a munkafolyamata egy *.ASM szerelés *.OBJ fájlformátumba történő exportálásának Solid Edge-ből, amikor a 3D modellek exportálása a feladat?
- Milyen minőségi szabványok és fájlelőkészületek szükségesek ahhoz, hogy a 3D modellek exportálása és árusítása sikeres legyen egy webáruhában?
- Miért ajánlott az OBJ és FBX exportálása a modellek 3D szoftverek közötti átviteléhez?
- Mely népszerű 3D renderelő és játékmotor szoftverek (pl. Maya, Unity, Unreal) támogatják az *.OBJ és *.FBX formátumokat, ha a 3D modellek exportálása a cél?
- Mit tegyek, ha az importált modell túl kicsi vagy túl nagy a Poser Pro rácsához képest?
- Hogyan másolhatom át egy alkatrész (pl. egy kerék) teljes anyag- és textúrabeállítását egy másikra mindössze néhány kattintással a Poser Pro-ban?
- Miért ajánlott a Diffuse és Specular színbeállításokat fehéren hagyni, ha képtextúrákat használunk?
- Miért elengedhetetlen, hogy a lemásolt alkatrészeket indexszámokkal (pl. Kerék 1, Kerék 2) mentsük el a kezdeti tervezési fázisban a CAD szoftverben?
- Milyen szerepet játszik a KeyShot bővítmény egy *.OBJ fájl Solid Edge-ből történő exportálásakor?
- Hogyan állíthatok be szülő-gyermek (parent-child) kapcsolatot a Poser Pro-ban úgy, hogy két alkatrész – például a kerék és a felni – együtt mozogjon animáció közben?
- Hogyan előzhetjük meg a textúrák elvesztését vagy a mappák rendezetlenné válását a modell megosztásakor vagy terjesztésekor?
- Melyek a legfontosabb beállítások (jelölőnégyzetek), amelyeket ki kell választani a Poser Pro exportálási ablakában, amikor a 3D modellek exportálása a cél egy webáruhába?
- Miért jó gyakorlat az exportált modellt egy teljesen új, üres projektbe betölteni a véglegesítés és az eladás előtt?
- Pontosan milyen fájlkiterjesztéseket (*.OBJ, *.mtl, képfájlok) kell tartalmaznia a letöltésre kínált ZIP csomagnak, ha a 3D modellek exportálása megtörtént?
- Miért lehet az *.FBX formátum bizonyos esetekben előnyösebb az *.OBJ-nél, ha a modell számos különálló részből áll?
- Milyen billentyűkombinációkkal (pl. Tab, P) és menüopciókkal – mint például a Blender különálló részek szétválasztása (loose parts) – lehet gyorsan szétválasztani a modelleket?
- Melyik munkafolyamat (1-14. lépés vs. 1-35. lépés) ajánlott annak, aki csak renderelni szeretne, és melyik annak, aki eladásra készít elő animálható modellt?
Bevezetés: Hogyan történik a 3D modellek exportálása a munkafolyamat során
Üdvözlöm a 3D művészeket!
Biztos vagyok benne, hogy sokan kísérleteztetek már különféle 3D renderelő szoftverekkel. Minden programnak megvannak a maga egyedi előnyei és speciális területei, ahol igazán ragyog. Ebben a cikkben megmutatom, hogyan történik a CAD szoftverekben készített 3D modellek exportálása hatékonyan 3D animációs és renderelő programokba.
Bár a fő fókuszom az átmenet lesz a CAD-ből Poser Pro-ba és a Solid Edge-be, ezek a technikák és alapelvek univerzálisak, és könnyen adaptálhatók más szoftverekre is, például a Blenderre.
Az útmutató végére pontosan tudni fogod, hogyan kell előkészíteni egy modellt a Poser Pro-ban a végső exportálásra – biztosítva, hogy bármilyen, OBJ vagy FBX formátumot támogató szoftverbe importálható legyen anélkül, hogy bármilyen anyag- vagy textúrabeállítás elveszne. Ez kulcsfontosságú, amikor a 3D modellek exportálása a célod, hogy eladd őket online áruházakban, vagy ingyenesen megoszd közösségi platformokon.
A formátumkompatibilitás fontossága: Miért jó az OBJ és FBX exportálása?
A végső cél az, hogy a modelled bármely programban pontosan úgy nyíljon meg, ahogyan megtervezted, amikor befejeződik a 3D modellek exportálása. Bár a szoftverek közötti tökéletesség nem mindig garantált, az, hogy a Diffuse, Specular és Bump térképek megfelelően töltődnek be, rengeteg időt takarít meg a végfelhasználónak.
A rosszul exportált modellek gyakran hiányzó textúrákat, átnevezett fájlokat és kaotikus mappastruktúrákat eredményeznek. Ennek elkerülése érdekében a 3D modellek exportálása során erősen ajánlom a leguniverzálisabban kompatibilis formátumok használatát, ami az OBJ és FBX exportálása. Ezeket a nagyobb 3D szoftverek (Blender, Autodesk Maya, 3ds Max, Cinema 4D, Poser Pro, DAZ) és a játékmotorok (Unity, Unreal Engine) is támogatják.
Az én 3D-s utam: A Posertől a CAD-ig
Ahogy fejlődünk modellezőként, gyakran fedezünk fel új szoftvereket, amelyek kiváló renderelési képességeket kínálnak. Az átállás azonban azzal a kockázattal jár, hogy elveszíthetjük a régi szoftverünkben felépített számtalan modellt.
Személy szerint számtalan jelenetet és karaktert építettem a Poser Pro 13-ban. Még ha kicsit régebbinek is számít, az egyszerűsége és a könnyű használhatósága mindig is vonzott. Bár a DAZ Studio talán magasabb szintű grafikát kínál, sosem léptem meg teljesen a váltást.
Azonban hamar rájöttem, hogy a Poser Pro nem arra készült, hogy komplex, egyedi 3D objektumokat hozzunk létre a nulláról. Ez vezetett el a CAD szoftverekhez. A korábbi tanulmányaimra támaszkodva megtanultam a Solid Edge-ben tervezni, és ezeket a modelleket behozni Poser Pro-ba. A trükk. A CAD modellt különálló komponensekként (szerelésként) kell megtervezned, nem pedig egyetlen szilárd testként, ha később textúrázni, animálni akarod a részeket, és azt akarod, hogy zökkenőmentes legyen a 3D modellek exportálása.
A végső munkafolyamat útmutató: 3D modellek exportálása CAD-ből Poser Pro-ba
(CAD to Poser Pro / export OBJ and FBX)
A végső célodtól függően ezt a folyamatot három különböző útvonalra bontottam, ha az export 3D models (3D modellek exportálása) a feladatod:
- A Útvonal (1-14. lépés): Csak Rendereléshez. Ha csak textúrázni és renderelni szeretnéd a CAD modelledet Poser Pro-ban anélkül, hogy bármilyen alkatrészt mozgatnál vagy animálnál.
- B Útvonal (1-18. lépés): Animációhoz. Ha bizonyos komponenseket szét akarsz választani a Poser Pro-ban animáció céljából (pl. forgó kerekek).
- C Útvonal (1-35. lépés): Eladáshoz és Megosztáshoz. Ha egy hibátlan, univerzálisan kompatibilis OBJ vagy FBX fájlt szeretnél exportálni nulla textúraveszteséggel.
1. Fázis: Előkészítés Solid Edge-ben (CAD)
- Indíts egy új Szerelés (*.asm) projektet a Solid Edge-ben. Építsd fel a modelledet logikusan. Ha egy autó kerekeit szeretnéd animálni, tervezz meg egy kereket, nyisd meg külön, és használd a “Mentés másként” funkciót az indexált másolatok létrehozásához (pl. Kerék 1, Kerék 2, Kerék 3, Kerék 4). Tedd ugyanezt a felnikkel is, ha más textúrát igényelnek.
- Rendelj véletlenszerű, eltérő felületi stílusokat (pl. Acél, Arany, Ezüst) a különböző alkatrészekhez. A tényleges szín nem számít; ez csak biztosítja, hogy az alkatrészek vizuálisan elkülönüljenek, és az anyagaikat később a program egyértelműen felismerje. Az anyagok szerinti csoportosítás sokkal nehezebb, ha a modell már a Poser Pro-ban van.
- Miután szétválasztottad, nyisd meg a KeyShot renderelő bővítményt a Solid Edge-en belül (telepítsd vagy engedélyezd a szalagon, ha nem látod). Azonnal szüneteltesd a renderelést – nincs szükséged kész képre. Lépj a Fájl menübe -> Exportálás OBJ-be.
- Mentsd el a fájlt egy egyértelmű névvel (pl. “Auto”) egy dedikált “OBJ Export” mappába.
- Most már lesz egy *.OBJ fájlod és egy *.mtl (anyagkönyvtár) fájlod a mappádban.
2. Fázis: Importálás és textúrázás Poser Pro-ban (CAD to Poser Pro)
- Nyisd meg a Poser Pro-t, és ments el egy új projektet (pl. “Auto Poser Projekt”).
- Lépj a Fájl -> Importálás -> Wavefront OBJ menüpontra, és válaszd ki a fájlt.
- Az Importálási beállításoknál győződj meg arról, hogy a “Centered” (Középre igazítva) be van pipálva. Megjegyzés: A Solid Edge és a Poser eltérő mértékegységeket használ. Ha nem látod a modelledet, lehet, hogy mikroszkopikus vagy éppen hatalmas. Próbáld 1%-on vagy 500%-on importálni, amíg meg nem jelenik. Amint láthatóvá válik, válaszd ki (pl. az “Auto” megjelenik a Props fülön), és használd a Scale (Méretezés) tárcsát a Parameters (Paraméterek) fülön, hogy a rácshoz igazítsd.
- A modelled jelenleg egyetlen szilárd objektumként viselkedik, ami megkönnyíti az egész autó méretezését és mozgatását. A CAD előkészítésnek köszönhetően az anyagok továbbra is különállnak.
- Nyisd meg az Anyag Szobát (Material Room). Kattints egy adott alkatrészre (pl. “Kerék 1”). Látni fogod a nevét megjelenni. Kattints végig a modellen, hogy megbizonyosodj arról, hogy minden CAD-ben szétválasztott alkatrésznek saját anyagzónája van.
- Alkalmazd a képtextúráidat a Diffuse, Specular és Bump csomópontokra (nodes). Profi Tipp: Mindig hagyd Fehéren az alap Diffuse és Specular színblokkokat, ha képtextúrákat használsz. Ez megakadályozza, hogy a színek helytelenül szorzódjanak fel, amikor a 3D modellek exportálása más szoftverekbe történik.
- Hogyan másolj gyorsan anyagokat: Amint a “Kerék 1” textúrázva van, kattints a PoserSurface csomópont tetejére, hogy aktívvá váljon. Kattints rá jobb gombbal -> Select All (Összes kijelölése). Kattints újra jobb gombbal -> Copy (Másolás). Most kattints a “Kerék 2”-re, kattints jobb gombbal a PoserSurface csomópontjára, és válaszd a Replace (Csere) lehetőséget. A teljes anyagbeállítás azonnal átmásolódik!
- Ismételd ezt addig, amíg az egész modell textúrázva nem lesz.
- (Az A Útvonal vége) Ha csak egy statikus képet szeretnél renderelni, készen is vagy!
3. Fázis: Alkatrészek szétválasztása animációhoz
- Az alkatrészek Poser Pro-ban történő szétválasztásához (pl. egy kerék megpörgetéséhez) nyisd meg a Grouping Tool-t (Csoportosító eszköz) az Editing Tools (Szerkesztőeszközök) között.
- Kattints a New Group (Új csoport) gombra, és nevezd el (pl. “Csoport 1”).
- Kattints az Add (Hozzáadás) gombra, válaszd ki a “Material” (Anyag) opciót, és válaszd ki a kereked anyagát a listából. Ez pirosan ki fog emelődni.
- Kattints a Create Prop (Kellék létrehozása) gombra, és add meg neki ugyanazt a nevet, amit a Solid Edge-ben használtál. Meg fog jelenni a Props (Kellékek) listádban.
- Döntő Lépés: Most törölnöd kell ezt a geometriát az eredeti autótestből. Válaszd ki a fő autó objektumot, nyisd meg a Group Editor-t (Csoportszerkesztő), és győződj meg róla, hogy a kerék még mindig pirosan van kiemelve. Kattints a Modify -> Invert (Módosítás -> Megfordítás) gombra (ez mindent kijelöl, kivéve a kereket). Kattints a Create Prop-ra, nevezd el “Auto 2”-nek, majd töröld az eredeti “Auto” kelléket.
- Ismételd meg ezt a (bevallottan unalmas) folyamatot minden mozgó alkatrész esetében.
- Kényszerek beállítása (Constraints): Ahhoz, hogy az alkatrészek együtt mozogjanak (mint egy kerék és a felni), kattints a Kerékre, menj az Object (Objektum) menübe -> Change Parent (Szülő módosítása), és válaszd ki a Felnit a listából. Most, amikor a kerék forog, a felni együtt fog forogni vele.
- (A B Útvonal vége) A modelled most már teljesen be van textúrázva és fel van riggelve az animációhoz a Poser Pro-ban!
4. Fázis: Exportálás bolti értékesítéshez és megosztáshoz (export OBJ and FBX)
- A modell terjesztésre való előkészítéséhez és ahhoz, hogy a export 3D models/export OBJ and FBX (3D modellek exportálása) sikeres legyen, kattints az Export -> Wavefront OBJ menüpontra. Hozz létre egy végső mappát (pl. “Auto Modell Letöltes”). Győződj meg arról, hogy ezek a jelölőnégyzetek be vannak pipálva:
- Weld body part seams (Testrészek varratainak hegesztése)
- Include body part names in polygon groups (Testrészek neveinek szerepeltetése a poligon csoportokban)
- Preserve existing material names (Meglévő anyagok neveinek megtartása)
- Copy textures to destination folder (Textúrák másolása a célmappába)
- Mentsd el a jelenlegi Poser Projektedet.
- Hozz létre egy teljesen Új Poser projektet (pl. “Auto Végső Teszt”).
- A Tiszta Szoba Teszt: Importáld be az épp exportált OBJ-t. Ha a Poser kéri, hogy keress meg egy textúrát, az azt jelenti, hogy egy fájl elérési útja megszakadt. Javítsd ki azonnal.
- Ellenőrizz minden anyagot, csoportot és alkatrészt. Ha minden tökéletesen működik, rendereld ki a promóciós képeidet különböző kameraállásokból (nagytotálok és közelik).
- A ZIP csomagolása: A modell eladásához vagy megosztásához csak az *.OBJ, az *.mtl és a kép textúrafájlokat (PNG/JPG) csomagold be egy ZIP fájlba. Ne foglald bele a Poser projektfájlokat. Ha hibákat találtál, javítsd őket a mesterfájlodban, exportálj újra egy “V2” mappába, teszteld újra, majd töröld a régi mappát.
5. Fázis: A végső szabvány – FBX létrehozása Blenderen keresztül (export OBJ and FBX)
- Bár egy OBJ gyakran elegendő, egy FBX fájl biztosítása hatalmas bónusz a vásárlók számára, mivel az FBX fájlok természetüknél fogva egyetlen fájlon belül, különálló objektumokként tartják meg az összes szétválasztott részt. Ennek legegyszerűbb módja a Blender használata.
- Nyisd meg a Blendert, és menj a Fájl -> Importálás -> Wavefront OBJ menüpontra.
- Kattints jobb gombbal a teljes modell kijelöléséhez (egy narancssárga körvonal fog megjelenni).
- Nyomd meg a Tab billentyűt a Szerkesztő módba (Edit Mode) lépéshez.
- Nyomd meg a P betűt a billentyűzeten.
- Használd a Blender különálló anyagok szétválasztása (Blender separate materials) funkciót: Válaszd ki a By Materials opciót a Separate (Szétválasztás) menüből. (Várj egy pillanatot, amíg kiszámolja).
- Nyomd meg újra a Tab billentyűt az Objektum módba (Object Mode) való visszatéréshez.
- Kattints egy üres helyre a kijelölés megszüntetéséhez. A modelled most már tökéletesen “felrobbantva” különálló objektumokra bomlott!
- Lépj a Fájl -> Exportálás -> FBX menüpontra.
- Mentsd el egy új mappába (pl. “Auto Modell Letoltes FBX”).
- (A C Útvonal vége) Végezetül csinálj egy utolsó “Tiszta Szoba” tesztet azáltal, hogy az FBX-et beimportálod egy friss Poser (vagy más szoftver) projektbe, hogy megbizonyosodj arról, a textúrák, anyagok és szétválasztott részek túlélték az utazást. Csomagold be ezt egy ZIP-be a webáruházad számára!
Következtetés: A 3D modellek exportálásának mesterfoka (export OBJ and FBX)
Export 3D models. Amint láthatod, a 3D modellek exportálása során a munkafolyamat nagyban változik a céljaidtól függően. Ha csak egy statikus renderre van szükséged, a folyamat hihetetlenül gyors, hála az okos anyagcsoportosításnak a CAD-ben. Ha animációra van szükséged, a Poser egy kis fizikai munkát igényel az alkatrészek szétválasztásához.
Végül, egy makulátlan modell piacra való előkészítése többlépcsős minőségbiztosítási folyamatot igényel annak biztosítására, hogy a végfelhasználók erőfeszítés nélkül betölthessék a modelledet.
Ha a végső ZIP-ed lehetővé teszi egy idegen számára, hogy nulla hiányzó textúrával importálja a modelledet a szoftverébe, akkor kiváló munkát végeztél, és elsajátítottad, hogyan történjen profin az export 3D models (3D modellek exportálása).
Remélem, hasznosnak találtad ezt az útmutatót, és elsajátítottál néhány új trükköt a munkafolyamatodhoz, amikor az export 3D models (3D modellek exportálása) a feladatod. Köszönöm, hogy elolvastad, és jó modellezést kívánok!
Nézd meg a cikkben modellezett 3D objektumot, amit feltöltöttem az áruhába és tudd meg, mire kell törekedned a modell feltöltésekor?